Although our speciality is GIS we also have a great makerspace area with laser engraving options, 3D printing, CNC machine work, as well as Vinyl work!
Today for our Tips and Tricks Tuesday, we are going to share some of our favorite vinyl tips and tricks!
Vinyl Definitions to Know
- SVG: stands for Scalable Vector Graphic. The easiest and most preferred type of file to upload onto Cricut Design Space.
- PNG: Is another file you can upload into the Cricut Design space, it will upload as one color.
- DXF: is a file that is used with Silhouette cutting machines.
- Canvas: the name of the design area in the Cricut Design space.
- Layer: the different layers of your image, usually the different colors.
- Group: The group option allows you to keep multiple elements of your design together so you can move them all at once in the design space.
- Un-Group: Allows you to ungroup the multiple elements of your design so you can rearrange them if you would like.
- Adhesive Vinyl: Adhesive vinyl comes with a paper backing and is sticky on one side. It can be permanent or removable.
- HTV: HTV stands for Heat Transfer Vinyl, also known as Iron-on vinyl, is vinyl that requires heat to activate, and comes with its own carrier sheet. Mainly used on shirts and other fabrics.
- Printable Vinyl: is ran through your home printer (inkjet only) to print a design on before you cut it out with your vinyl machine
- Transfer Tape or Transfer Paper: Transfer tape (also known as transfer paper) is used to transfer adhesive vinyl to your project after it’s been cut as well as weeded.
- Scraper, Squeegee or Applicator: It’s the tool you use to burnish (rub really hard) your transfer tape or vinyl.
- Carrier Sheet: One side is the vinyl; the other side is a plastic sheet that’s somewhat sticky which holds the vinyl in place.
- Attach: tells your machine that you want your design to be cut exactly the way it looks in Design Space.
- Weld: Weld is used when 2 or more layers are overlapping and you only want to cut the outer lines.
- Flatten: This will change the image on your canvas to a print then cut project.
- Slice: This will split two overlapping layers into different parts.
- Contour: Contour will let you modify a design by erasing individual cut lines.
- Score: Will make a fold line in your paper with the scoring stylus (or wheel on the Maker)
- Quick Swap Tools or Adaptive Tool System: This is for the Maker only. This system uses one housing and then the tips are ‘swapped’ for different functions.
- Carriage: This is the part that holds the blade and tools that moves back and forth on the roller bar.
- Star Wheels: The small white rings on the roller bar. They help provide grip, but you will need to move them out of the way when cutting thicker materials.
- Mirror: You will use “mirror” when cutting HTV or infusible ink. This mirrors your image so that it looks correct after you apply it to your project.
- Weeding: Weeding is when you remove the extra or negative vinyl after it’s cut.
Vinyl Tools
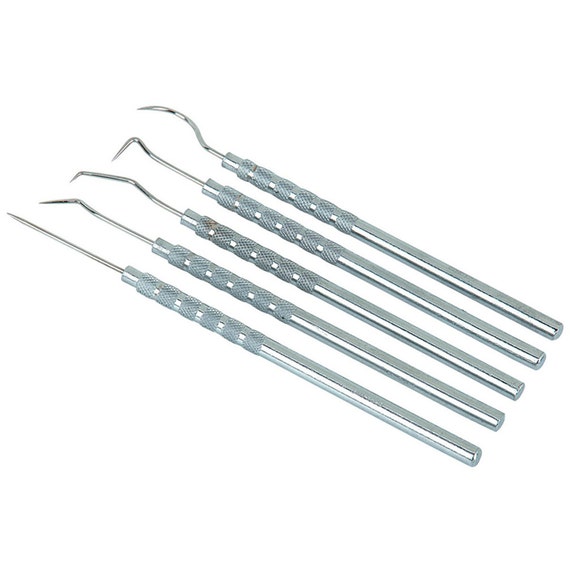
Weeding Picks: Are the best tools when it comes to wedding your vinyl. The pointy tips are best at picking the little pieces of vinyl out of your design.


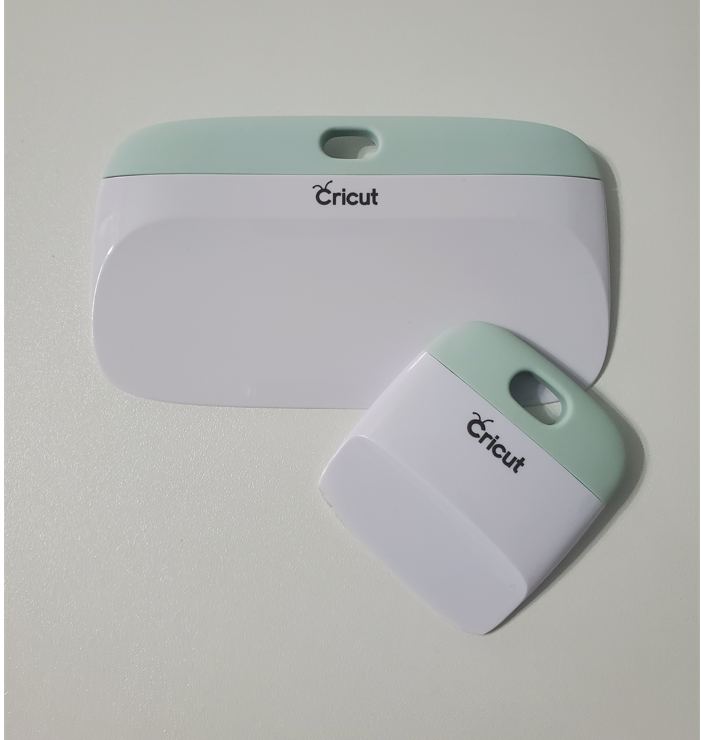
Scraping tool: The scraping tool is best used to remove bubbles from vinyl when putting vinyl on cutting matt. It is also a good tool to burnish (rub really hard) your vinyl onto your transfer tape.
Now On With the Tips!
- Always use a scraper tool to remove any bubbles and smooth out your vinyl on your cutting mat. Having a smooth surface will prevent messy application, unexpected tearing, among other issues that could happen.
- Always remember to turn the “mirror” on when cutting HTV. Heat Transfer Vinyl is applied with heat and therefore, should be “flipped”.
- Try heating your project up for a few seconds before placing your vinyl on it. This can help you get better results by giving you a flat even surface to work with.
- Add pressure. Adding a little bit of pressure to your heat press can result in a better as well as faster application. Not a lot of weight, but a little bit.
- Do not overheat! When applying your vinyl start with 10-15 second intervals, then add more time if needed.
- Check a small area first. Before removing the carrier sheet, lift a small area where the vinyl should be adhering to your project to make sure it is staying on. If the vinyl is not sticking trying a) applying more heat at 10-15 sec intervals, being careful not to scorch your project, b) check a small area when your project is hot, if not sticking, check again when your project is warm/cold.
- Glitter goes last! Do not put any layers on top of glitter vinyl. The glitter will prevent any other layers from correcting adhering to your project surface.
- Good lighting. When weeding a design with a lot of pieces that need to be weeded, invest in a lamp or an area with good lighting so you can see all the light pieces.
- Print design. When a design has a lot of detail in it, it is best to print a copy of the design (regular print from a printer) so you can look back to make sure all the pieces have been weeded.
- Get a tissue box. Using an old tissue box to scrape vinyl scraps into can prevent little pieces of vinyl getting all over the place.
- Canvas color change. You can change the color of your canvas if you are trying to see what your design will look like in different colors or in different colors.
- Cleaning your blade. The easiest way to clean your vinyl cutting blade is to ball up some aluminum foil, then poke the ball with your blade a few times. *Be careful not to poke yourself**
- Transfer tape is a pain! Adding transfer tape can be such a pain. One thing we have discovered is to use wax baking paper as a buffer when using transfer tape. Wax baking paper is non-stick, therefore the transfer tape does not stick to it.
- Transfer tape too strong? Is your transfer tape too strong? Try sticking it to your counter, shirt or something that makes it a little less sticky.
- Google: Googling free svg is a great way to find free svgs online.
Free SVG Websites!
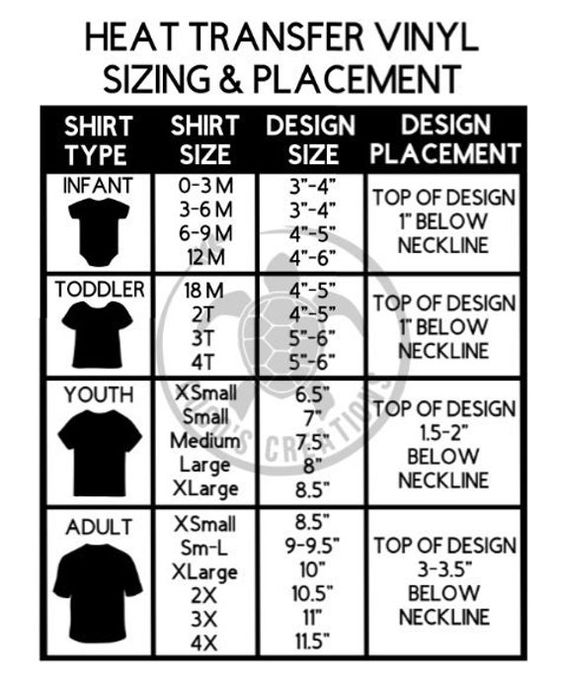
Here is a heat transfer vinyl sizing and placement sheet.


Great Post!